Consider the central heating system in its simplest form: hot water flows into radiators that transfer the heat into the room, cooling the water, which then returns to the boiler.
The radiators will have two valves fitted in-line, one at each end of the radiator panel. One should have a fluted grip and is designed to be adjusted easily by hand to allow someone to adjust the heat output. The other, the lockshield is usually concealed under a smooth cap and is more of a system regulation valve: it’s meant to be adjusted such that all the radiators, when they’re all calling for heat, get an even share of the water flow.
As an aside, lockshields are often used by a homeowner as a convenient way to isolate a radiator when decorating. It’s not uncommon to find them all fully open rather than acting as the load-balancing control they are meant to be!
One of the main failings of these two controls is that there’s no automatic shut-off when a room reaches the desired temperature: both the lockshield and manual valve will continue to allow hot water into a radiator for as long as the circulation pump delivers it. When you consider that most homes will want a warmer living room but a bedroom that’s a few degrees cooler, having manual valves controlling the flow is very inefficient and a huge waste of energy.
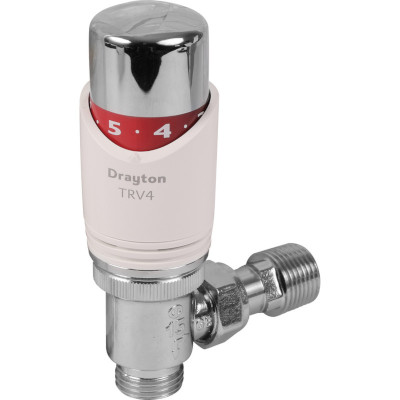
Fortunately, improving the efficiency of the system significantly isn’t hard: exchange the manual valve for a Thermostatic Radiator Valve (TRV). These devices comprise two parts, the valve body itself that regulates the flow of water and a temperature-sensing head that controls the valve below.
Unfortunately, unless each radiator already has a pair of isolating valve between it and the circulation pipework, fitting TRV’s means draining the central heating system. As such, it’s probably best to do several at once because draining a system is, at best, a slow process. When a system is refilled, an inhibitor should always be added to the expansion tank so it also makes financial sense to only refill the system occasionally.
The procedure itself is very straight forward:
- Isolate the radiator using the in-line valves or drain the system
- Drain down the radiator if it’s isolated (if you’ve drained the whole system you should only get a few drips at this point)
- Remove the old manual valve
- Clean the existing pipework
- Attach and tighten the connections for the new valve body
- Restore water flow to the radiator/refill system, check for leaks then bleed air as required
- Fit the TRV head and set temperature
In our experience, there’s usually a number of things to catch out the unwary. The new TRV valve won’t match the pipe fittings that the manual valve was attached to (meaning additional pipework is required) or – and most common – there’s a slow leak from a re-made joint.
We can’t offer much advice regarding pipework not fitting because each case will be different – but it’s quite common to find that the old manual valve used a short stub pipe (‘tail’) that fits into the radiator. Look into the end and you should see there’s a hexagonal surface. If so you will probably need to replace this with the tail that comes with the TRV. You’ll need a radiator spanner – they’re a few Pounds from your favourite trade/DIY outlet – and it’s just a brute force job to remove the old tail.
Dealing with the issue of leaks: we found that making sure the pipework is scrupulously clean and un-deformed before making the new joint is an absolute requirement. Any flakes of paint or a slight flattening of the pipe over the area the olive/connection is made will almost certainly cause a weep when water is restored. Wiping a thin coating of Plumbers Mate – a non-setting mastic – around screw threads and olive unions before assembly is definitely recommended. If you don’t have a tin of this, we strongly suggest buying some – along with a couple of spare lockshields and a few additional olives if you’re using compression fittings. Wire wool will do an excellent job of removing stubborn scale, old jointing compound and light marks from copper pipes.
Tightening fittings on copper pipe: wind the nut by hand to start with (it’s next to impossible to cross-thread a nut by hand, minimising one potential issue right away) and then use a well-fitting adjustable spanner to pinch it up to hand tight. Now, using a second spanner on the valve body to prevent any rotational forces being applied to the non-moving part, tighten the nut. There shouldn’t be any need to bring it to ‘car wheel nut’ levels; the intention is to deform the olive enough so it compresses into the gap between the pipe and chamfered inner walls of the new fitting. It’s an experience thing, unfortunately; there’s no torque setting so use some common sense.
Once the new valve is fitted, it should be a case of refilling the system or opening the shut-off valves and monitoring for any leaks. If you’ve used mastic and the right amount of nut-tightening, you should be good to go!
Fitting the TRV head: It’s far, far easier if you set the head to its ‘max’ setting first. Equally, if ever you need to remove a RTV, change the setting before trying to slacken the retaining collar.
Finally, the numbers on the RTV head never seem to relate to degrees C or anything remotely useful! In our experience, there’s two ways to figure out the right setting: experiment by gradual adjustment or open the valve to the maximum setting and, as soon as the room is at the temperature you want, wind the valve head down until you hear the flow of water stop. If fitting these heads in rooms where people might inadvertently adjust the setting and spoil your carefully crafted work, you may find that you can remove the TRV head, turn it upside down and move a small pin into one of several holes, limiting the minimum or maximum adjustment.